Weatherproof Sockets and Switches


SAFETY WARNING

  • Ensure the mains isolator is switched off at the consumer unit before commencing works. If in doubt consult a qualified electrician. Further information is available online. Wiring should be installed in accordance with the latest edition of the IET regulations BS7671.
  • The total load on the circuit may not exceed the rating of the circuit cable, fuse or MCB once the switch plate is installed. The circuit must be protected by an appropriate fuse, , RCD (Residual Current Device) or circuit cable.
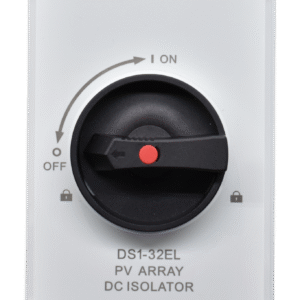
  • For security to prevent unwanted tampering of the switch/socket, the cover has a lug which features a 6mm hole which can accept a padlock or similar locking security device (not supplied). This product is IP66 and must be earthed.
  • EARTH = GREEN/YELLOW
  • NEUTRAL = BLUE / pre-April 2004 BLACK
  • LIVE = BROWN / pre-April 2004 RED
SKU: WS2G Category:

Part Numbers

WS2G 2 Gang Weatherproof Socket
WE2G 2 Gang Weatherproof Empty Enclosure
WS1G2W 1 Gang Weatherproof Switch, 2W
WS2G2W 2 Gang Weatherproof Switch, 2W
WSF1G Weatherproof 13A Switched Fused Connection Unit


INSTALLATION INSTRUCTION

  • An outdoor location should be chosen ensuring adequate access to a mains supply circuit. The unit should be mounted on a clean, rigid vertical flat surface suitable to accept screw type fixings as unevenness can cause product damage or affect operation.
  • Remove front assembly from the back box. Mark the location, using the backbox as a template and drill the fixing holes. Note – the drilling of the drain hole will reduce the IP rating of the unit. Only one 3-5mm drain hole position can be drilled. If using conduit to the bottom entry, the drain hole should be drilled to the lowest point of the conduit run not in the back box. If metal conduit is used, earth continuity across the conduit must be maintained using appropriate connections.
  • Ensure adequate excess lengths of cable for connection to switch or socket, remove pre-fitted blanking plugs as required by pushing out from the inside and install a suitable IP gland (not supplied). For rear entry, cut or drill a 20/25mm hole and install a suitable IP rated grommet (not supplied). Only remove the blanking plugs for positions used.
  • Feed the mains cable to the unit and secure the back box to the surface. The fixing holes are slotted to allow some rotational adjustment if required. Wire the switch/socket as diagram below. Ensure the polarity is observed correct. L – Live (brown), E – Earth (green/yellow), N – Neutral (blue). The switch/socket may be removed from front assembly to aid wiring process.
  • Check all connections are secure with no loose strands. An earth connection must be made to an earth terminal of the socket. All bare wires must be sheathed. An earth terminal in the back box is provided if required.
  • Fit the socket/switch front assembly ensuring the gasket is not pinched or damaged. Take care not to compress, damage or trap any cables. Secure front assembly with screws provided and do not over tighten. Switch on and check operation. The cover will seal regular sized UK plugs. Cover must be closed and secured when not in use.

TECHNICAL

  • Voltage : 220-250V ac Frequency : 50/60Hz
  • Socket Terminal Capacity : 3 x 2.5mm², 3 x 4mm², 2 x 6mm²
  • Switch Terminal Capacity : 3 x 2.5mm², 3 x 4mm², 1 x 6mm²
  • Fuse Terminal Capacity : 4 x 2.5mm², 3 x 4mm², 2 x 6mm²
  • IP Rating : IP66 (when cover securely closed)

GENERAL CARE

  • At the end of their useful life the packaging and product should be recycled in the correct manner. Check your local authorities for details.
  • Clean with a soft dry cloth only.
  • Do not use solvents, cleaning products or white spirits.

Dimensions

SHOPPING CART

close